
Essential Tips to Mic an Acoustic Guitar

Matt Vanacoro
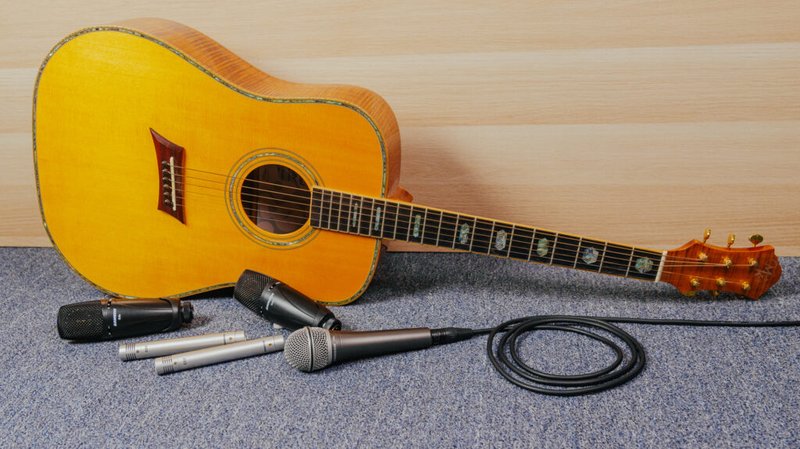
Getting the perfect sounding acoustic guitar ‘sound’ can often be as elusive as my 9-year-old when it’s time to go to the dentist. The ‘holy grail’ tone that you hear on your favorite recordings may seem intimidating to tackle, but it really comes down to knowing your instrument, knowing your recording gear, and knowing how to make those two things work for you, and not against you. You’ve got quite a few choices when picking a mic and a setup for recording an acoustic. Here are my favorite ways to mic the acoustic guitar and get a crystal-clear sound when tracking.
Watch "Miking an Acoustic Guitar" to see and hear the techniques outlined in this article.
Using A Single Microphone
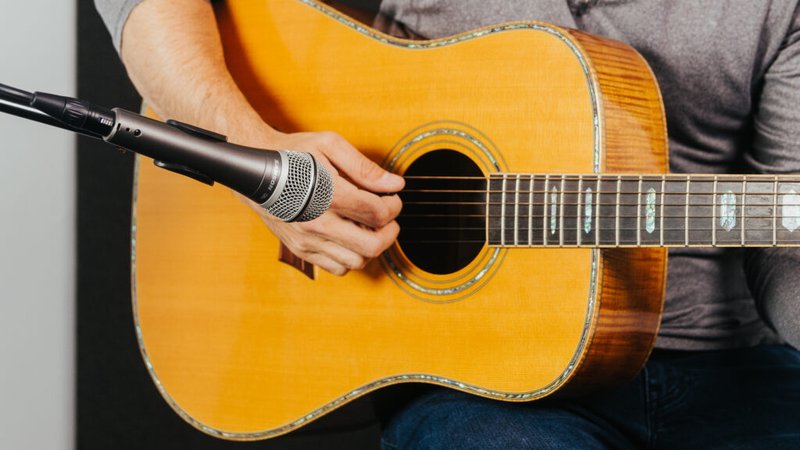
You’ll want to set the mic up to pick up as much of the natural sound of the instrument that it can. The most common starting point for miking an acoustic guitar is right where the neck meets the body. If the guitar sounds a bit boomy, you can inch it away from the body and a little further up the neck. If the guitar sounds too thin, fix this by moving the mic towards the body. Pointing the mic directly at the sound hole will often give you a heavier mix of lower frequencies and you’ll lose some of the beautiful percussive nature of the instrument.
When you angle your mic, you’ll also want to consider coming in from slightly above or slightly below the guitar. This will give you a bit of safety from the sound hole suddenly pointing directly at the mic when the guitarist invariably shifts a bit. For distance, this can all depend on how much body you want the sound to develop. I’ve seen engineers rig up a mere 2 inches from the instrument and I’ve seen setups that are 3-4 feet away in professional studios. A lot of this can depend on the player and how consistent they are with their dynamics and direction. A player that ‘shifts around’ a lot while they play might not benefit from a mic 2 inches from their instrument as the shifting will cause drastic changes in tone at that proximity.
Polar Patterns
When using a single microphone, you have the choice of selecting different polar or pickup patterns. Each pattern picks up sound differently, so it’s good to understand how it affects your sound and choose the right one for your needs. Omnidirectional microphones pick up sound evenly from all directions. This makes them ideal for recording acoustic guitars, because they capture the full sound of the instrument. You can use the omni pickup pattern when you want to capture the ambient sound and natural reverb in a room where you are recording. The omni pattern is the least susceptible to proximity effect, which means the frequency response does not change with the movement of the microphone closer to the sound source. Cardioid microphones are directional, picking up sound primarily from the front and sides. The unidirectional nature allows for better separation of instruments in the studio and more control over feedback in live sound reinforcement. When positioned correctly, the cardioid pickup pattern allows you to pick up more of the sound you want and less of the sound you don't.
Typically, you will use a condenser microphone on an acoustic guitar in the studio, such as the CL8a, which has a wider frequency response and higher sensitivity than a dynamic microphone, allowing it to capture the full sound and subtle nuances of the guitar.
That doesn't mean a dynamic mic sounds bad, it just sounds different, and a dynamic mic like the Q8x may be what you're looking for. Because of their lower sensitivity, dynamic microphones are great for miking a guitar in a live performance to reduce the chance of feedback, and a cardioid pickup pattern can isolate it from other instruments on stage.
Sometimes More is More
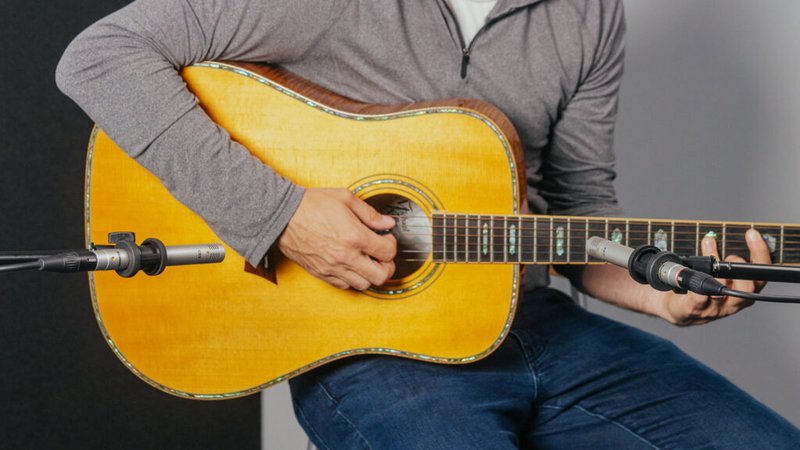
If you want to leave yourself room for crafting the sound a bit in post, you can always record with more than one microphone, and mix them. Sometimes I’ll be happy with the balance I’m getting at the neck/body junction, but just want a bit more clarity for a particularly exposed phrase or section of a song. In these cases, I’ve often got a second mic a little higher up the neck that I’ll mix in to give me that clarity without sacrificing my ‘golden’ main track. Having a discreet pencil-style condenser like the Samson C02 is great for this purpose as it has a nice and focused cardioid pickup pattern and is small enough not to require a huge footprint as a ‘second’ mic.
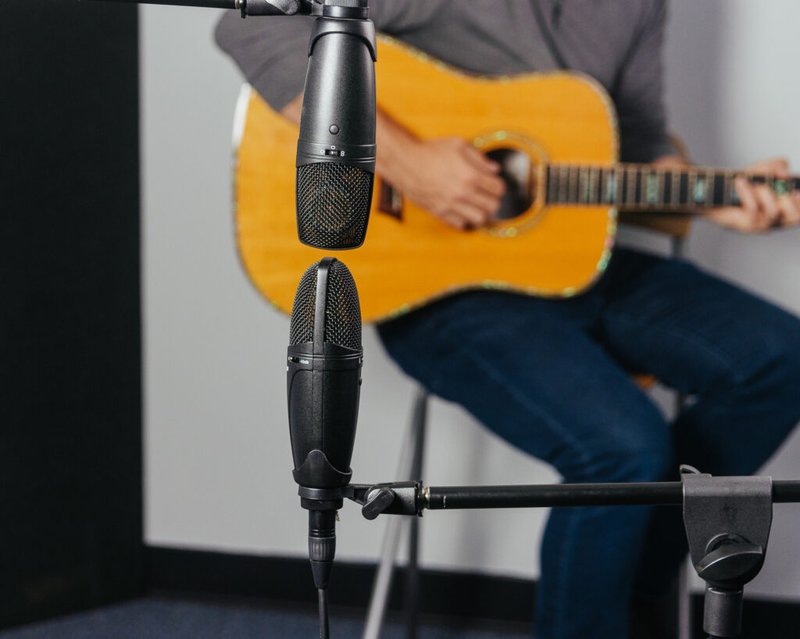
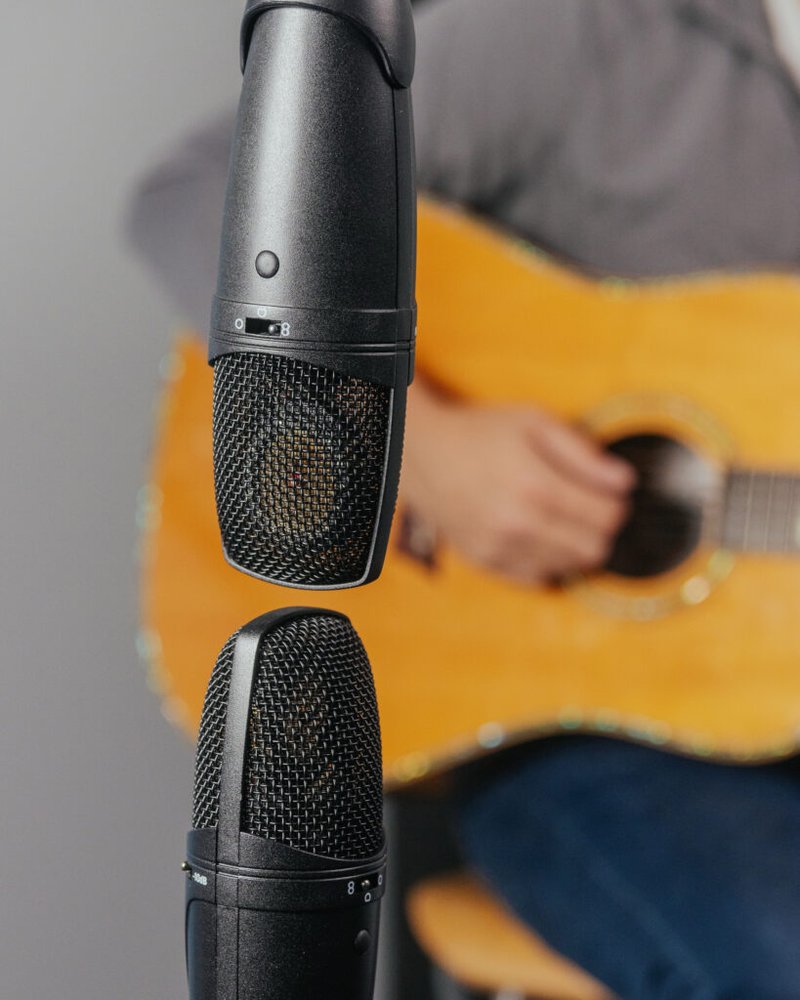
A Perfect Pair
By using two C02 microphones you can create a number of stereo microphone arrangements.
X/Y
One of the most common stereo patterns is the X/Y, or coincident, pattern, in which two microphones with identical pickup patterns are crossed so that the capsules of the microphones are lined up and at exactly the same distance from the source. The X/Y pattern has excellent mono compatibility and can be used at a variety of distances, including extremely close to the source. The only drawback is that this technique does not produce a wide stereo image.
Spaced Pair
A spaced pair is two identical microphones facing directly forward on a level plane with each other. The distance between the microphones is typically three times the distance from the sound source. A good starting point is 16-24 inches (40-60 cm). When mixing, pan each microphone hard left and right to its proper side. Spaced pairs produce wide stereo images but have poor mono compatibility.
Blumlein Pair
If you have 2 microphones with a figure 8 pickup pattern (like the bidirectional CL8a) you have a unique opportunity to use a mic technique called a Blumlein pair. This setup is particularly effective if you are going to mic an acoustic guitarist who also sings. The Blumlein placement utilizes 2 microphones with bidirectional pickup patterns. You place them in front of your source ‘head to head’ and configured so that the capsules are crossed at 90 degrees. In this case, what you’ll wind up with is one capsule pointed fairly well to pick up the guitar, and another capsule angled well to pick up the vocals. The mics will be placed at identical distances from the source, resulting in no phasing delay issues that can commonly plague multi-mic setups on instruments and voice. The bidirectional nature of the mics will pick up plenty of the natural reverberations of the room as well, giving you quite a well-polished sound in a good environment!
Flipping the Pair
Mid/Side
If you want to record a guitar and give it a real sense of "space" across the stereo field, you may want to invest some time in learning the Mid/Side technique. This is another setup pioneered by Alan Blumlein (see above), but it requires a slightly different configuration and some work on the post-production side. Plug-ins and built-in DAW Mid/Side decoding make this easier than ever!
This setup doesn’t require a ‘perfectly matched’ set of mics that you would use for Blumlein pair. You’ll set up the first mic, the ‘Mid’ mic, facing the center of your instrument — just as you would with a single mic. Find that sweet spot for your guitar where the neck meets the body. This mic should be set up in a tight pickup pattern like a cardioid or hypercardioid. You can use a dynamic or a condenser for this mic, you want it to sound good as your ‘primary source’.
Your second mic (the ‘Side’ mic) needs to be a figure-8 pickup pattern. This microphone will *not* be aimed directly at the source, but off-axis by 90 degrees. The Side microphone is going to contain the ambiance and (eventually) the directional sound. When using Mid/Side, I usually simply set one microphone up directly above the other.
The magic is in the mixing with Mid/Side. Your Mid mic should be panned center, that’s the easy part. If you’re not using a plugin which automatically decodes Mid/Side, you’re going to have to get your fingers a bit dirty from here. Essentially, you’re going to want your Side mic to be split to 2 channels, and you’re going to reverse the phase of one of the channels. These channels will be panned 100% hard left and right. This will give you an accurate representation of the stereo ambiance field, and give you control over how much of it you want to hear. The inverted polarity will make the Side mic channels enhance the spacial qualities of your mid channel as you bring it up. You have total control of how ‘wide’ your stereo field is by how much you bring up the Side channels.
Read this article to learn more about stereo microphone recording techniques.
It’s Not Just the Mic
You’d be surprised how many folks don’t consider the actual recorded instrument the first part of the chain. Having an instrument that is in top shape should be priority number one. Computer programmers have a saying that I ‘borrow’ when I’m teaching recording techniques, and that is “Garbage In, Garbage Out”. Having the most expensive mic and preamp in the world is only going to give you a crystal clear recording of a crummy guitar if you haven’t properly maintained the instrument. Change your strings regularly!
It might sound crazy to worry about mixing before you’ve even started miking, but having a plan for ‘where you want this instrument to sit’ in the mix can affect the type of tone you pursue. If the acoustic guitar is playing a supporting role in an already thick mix, you might regret aiming for a ‘body heavy’ tone and wind up EQing away a lot of the ‘meat’. Knowing what kind of role the acoustic is going to play in your recording will help you determine whether the instrument needs enough body to ‘stand on its own’ or should be a bit thinner so it can ‘cut through the mix’. Think about what you want this track to do before you start setting up and you’ll save yourself a lot of time later on!
The room and area you’re recording in will often heavily influence what kind of mic you’re going to use. Is the room noisy? Is it isolated from the outside world? What other sounds are you going to pick up when you plug in that fancy condenser mic?
If you have a multi-pattern mic like the Samson CL8a, you’ll want to take the surrounding area into consideration before you choose the pickup pattern. If you’re in a room that has a beautiful natural sound like a treated studio or a hall designed with acoustics in mind, then it’s like you’ll likely be ok with picking up a bit of that natural room sound. Using an omnidirectional setting will allow you have a less ‘focused’ sound and avoid the proximity effect of a highly directional mic.
As you can see, there’s a lot that goes into getting a great acoustic guitar recording. Starting with a great mic is essential, but it is just the tip of the iceberg!
About the Author